Navigation:
System Configuration Admin > Access Control > User Group Management >> Create User Groups
Create User Groups

Contents
To Create a User Group
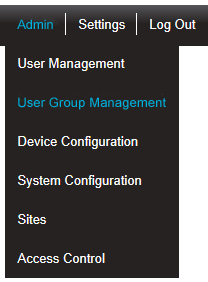
1.Select User Group Management from the Admin menu, located at the right hand side of the top menu bar. See Figure 139 below:
Figure 139
2.After selecting User Group Management the Create User Groups screen is displayed. See Figure 140 below:
Figure 140
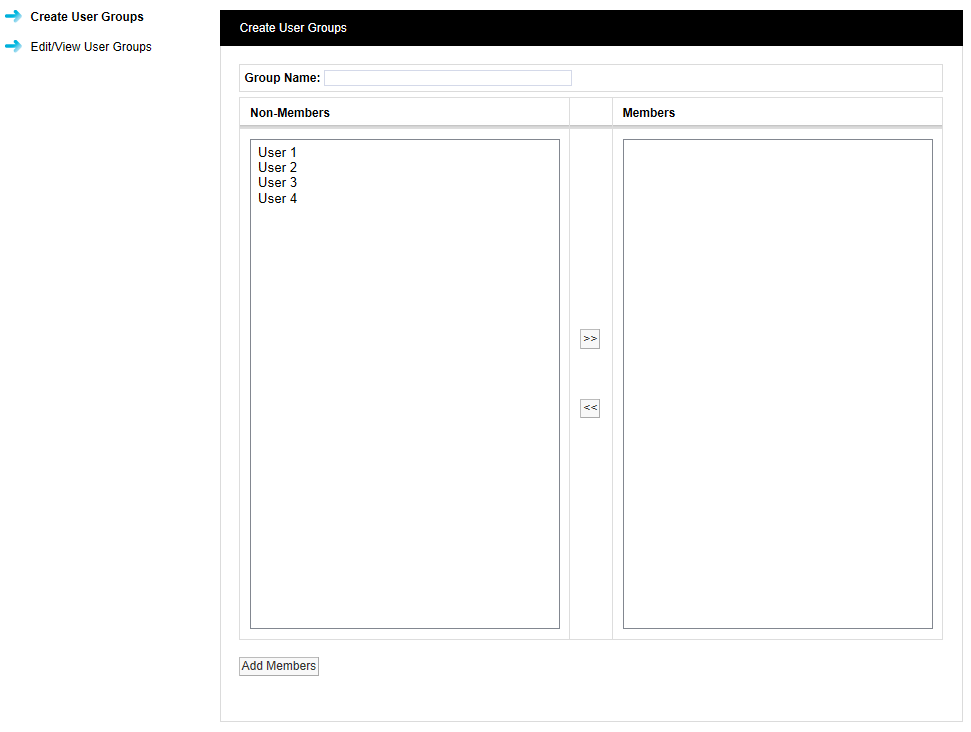
3.Enter a name for the User Group in the Group Name field of the Create User Groups window. See Figure 141 above.
Examples of User Group names are shown below:
•T+RH sensors for a small site this could be used to allow access to all of the temperature and humidity sensors.
•T+RH sensors 1st Floor for a larger site this could be used to allow access to all of the temperature and humidity sensors on one floor.
4.Select the users that you would like to add to the group from the Non-Members column in the Create User Groups window.
•All available users that have not already been associated with a group will be shown in the Non-Members column. To select more than one User hold the Ctrl key and select the required users.
5.Once you are happy with the selected users click the double left arrows located between the columns, this will move the selected users to the Members column.
•Users can be de-selected by selecting them in the right column and clicking the double left arrows.
6.When you are happy with your selection, click on Add Members.
•You will be asked if you would like to proceed, see Figure 142 below:
Figure 142
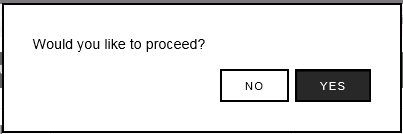
6.Select Yes to proceed and create the new User Group or No to abort.