Navigation:
System Configuration Admin > System Configuration > Sensor Groups > Local Alarms >> Setting Up Local Alarms
Setting Up Local Alarms

Contents
To Set Up Local Alarms
1.From the View Sensor Groups window, select Edit/View Sensor Group from the left hand menu. See Figure 220 below:
Figure 220
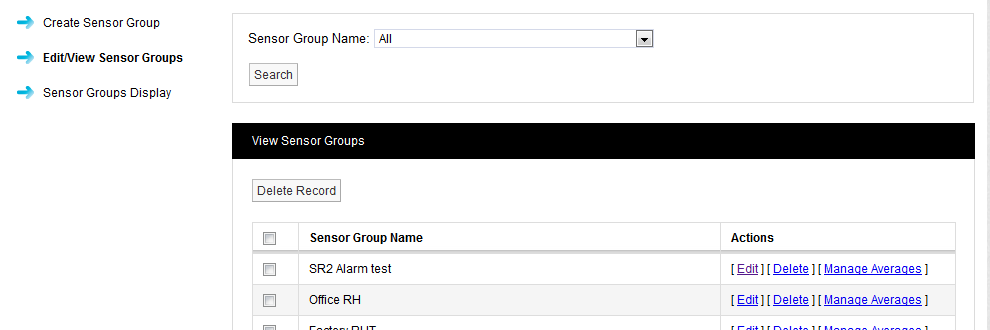
•If necessary, create a Sensor Group, as described in Managing Sensor Groups, adding the required Sensors.
2.Click on the [Edit] in the Action column on the row containing the Sensor Group to assign the Local Alarm to.
•The Group Name: <group name> window is displayed, listing the Zones/Members associated with the selected Sensor Group. See Figure 221 below:
Figure 221
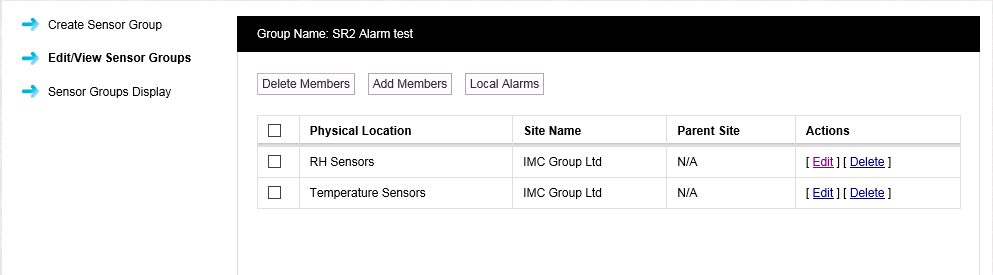
3.Click the Local Alarms button to display the Local Alarm Details window. See Figure 222.
•This example shows the Local Alarm Details window displayed when no Local Alarms have previously been assigned to the selected Sensor Group.
Previously assigned Local Alarms will have their details displayed in this window which can be edited.
Figure 222

4.From Device Type: drop-down list, select the required Control Device Type; SR2 or CR2 USB. See Figure 223 below:
Figure 223
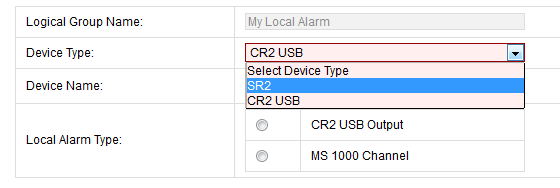
5.From the Device Name: drop-down list, select the required Device by name.
•The view will now change to display Device information and Local Alarm options. See Figure 225 below:
Figure 224
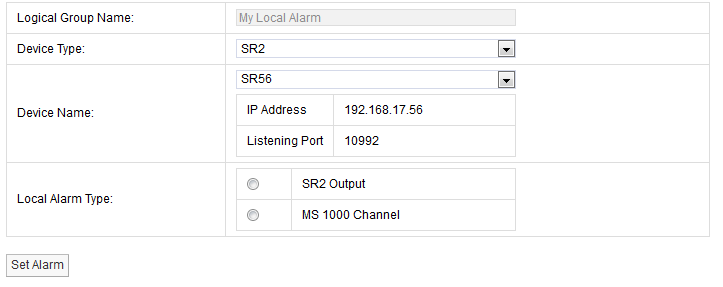
•In the example above, SR2 has been selected, but CR2 operation is almost identical.
6.To output to an SR2 Alarm Relay:
•Select the option button, adjacent to SR2 Output in the Local Alarm: section of the window.
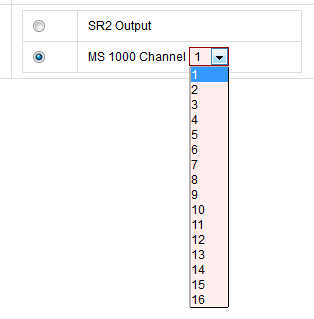
i.Select the option button, adjacent to the MS 1000 Channel in the Local Alarm: section of the window, to display the MS1000 Channel drop-down list. See Figure 225 below:
Figure 225
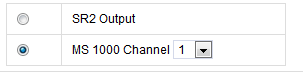
ii.Select the required channel number from the MS1000 Channel drop-down list. See Figure 226 below:
Figure 226